|
TACTICAL RIFLE REVIEW
Tactical Defense Insitute
2174 Bethany Ridge Rd.
West Union, Ohio 45693
Ph: 937-544-7228
Fax: 937-544-2887
Website: www.tdiohio.com
ACTION VACATION
Admittedly, I can never get enough range time, whether it's with a pistol or a rifle. Maybe that makes me a training junkie.
For some time now, I've wanted to improve my skills with the carbine version of the AR-15 rifle. I was looking for a place
relatively close to do serious training under professional instruction, but found none in my area. In the early summer of
2005, I missed a chance at a tactical carbine class with Pat Rogers in Michigan because of work. Other well-known schools,
like Thunder Ranch in Oregon and Gunsite in Arizona, are not practical options for me due to travel time and cost.
I eventually discovered information on the Tactical Defense Institute (TDI) in southern Ohio. Located about an hour
east of Cinncinati, amid Amish country in the beautiful rolling hills of Adams County, TDI provided exactly the training opportunity
I was looking for. Any place within a 6-hour drive is reasonable, so getting to Adams County wasn't an issue.
The specific course offered, Tactical Rifle I (TR-I), took place over 3-days in July of 2005. Cost was $450 ($150 per
day). This, of course, did not include associated motel, food or transportation costs. Beyond the anticipated training and
skill improvement, I was looking forward to an "action vacation" - both physically and psychologically. What follows below
are the details of my training experience.
ABOUT TDI
TDI is a defensive firearms training facility run by its president and chief instructor, John Benner. An exceptionally personable
gentleman, John is a 30-year police veteran, with 25 years spent with the Hamilton County Regional SWAT unit, including 20
years as Commander. He holds instructor certifications from the Ohio Peace Officer Training Council (OPOTC) and from the NRA.
TDI has a staff of assistant instructors who, by virtue of their training and law enforcement or military experience, are
qualified to teach the safe and proficient defensive use of handguns, rifles or shotguns.
TDI's range facilities include: a main pistol range with a covered firing line; a 400 yd rifle range (with firing lines of
25yds, 50yds, 100yds, etc., out to 400yds); three Live Fire Houses; a vehicle range for shooting from and around vehicles;
a two-story "force-on-force" house; and a jungle trail. Additional ranges are in design or under construction. There is a
large air-conditioned classroom where course orientation and instruction take place on the morning of the first day. A full
calendar of the courses and the specific requirements and cost for each is posted on TDI's website (see link above).
TACTICAL RIFLE I
Following Clint Smith's dictum that "two is one and one is none," I took two AR carbines chambered in 5.56mm to TDI. I wanted
to test both under hard use and to have a back-up in case one went down.
TR-I is a "basic" tactical rifle class. That means if you have an AR rifle or carbine (Colt, RRA, Bushmaster, LMT, etc) that
has been sighted-in for 100yds and runs reliably with several decent 20- or 30rd mags, you're good to go.
TR-I provided the opportunity to do several things: to develop a basic CQB skill set in handling and shooting a military-style
weapon; to improve marksmanship; and to test equipment (guns, mags & gear). The following set-up worked for me. You may prefer
a different set-up on your rifle, such as barrel length/twist rate, stocks, BUIS, optics, slings, mag carriers, etc.
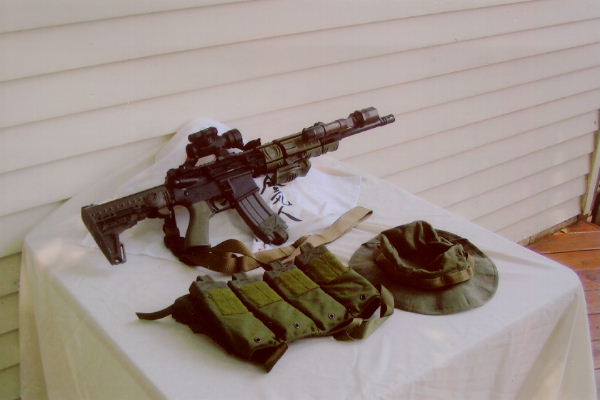
1) Carbines Taken.
For lack of a better name, I call the first one "Big Green Operator":
• Upper: LMT MRP with carbine-length rails and a 1/7 twist 16" CL barrel. Standard LMT BC and bolt group. Troy front
& rear BUIS.
• Lower: Bushmaster with standard trigger group and Magpul 93 stock.
• Green furniture is a combination of Magpul stock, Tango Down rail covers and grip, TDI-Arms folding-front grip and
short rail covers (TDI-Arms is a company out of NYC that markets some AR-related accessories; no relation to TDI in Ohio).
• Optic is an Aimpoint (AP) ML2 red dot in a LaRue Mount w/ ARMs locking lever.
• Weapon-mounted light is a SureFire 962, with clicker end cap and "felon-stopper" strike bezel.
• Sling is a Specter single-point with HK snap hook. On this carbine, however, I'll be switching to a Troy single-pt
because it bears the weight better. I tried a Troy at TDI and really liked it.
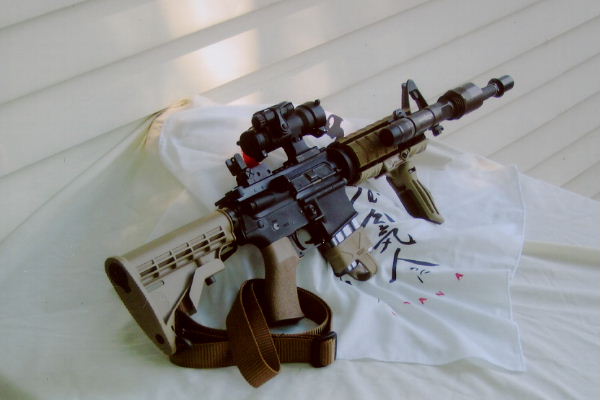
The second one, "Coyote Colt Carbine," has:
• Upper: Colt 6920 Deluxe with CL HB, 1/7 twist. Factory handguards were replaced with Surefire rails. Standard Colt
BC and bolt group. I've had this upper for years and it runs great. Front sight is the factory fixed sight. Rear is a Wilson
folding BUIS, with single aperture (diameter is half-way between the A-2's small & large peep).
• Lower: Rock River Arms, with RRA 2-stage Match trigger group and 6-position collaspable stock with tan buttstock.
• Coyote/tan furniture is a combo of TD grip and rail covers, and TDI-Arms FFG and short rail covers.
• For this carbine I tried a cheap Vantage V30 red dot (30mm) fixed in an AP detachable mount. The Vantage worked okay,
but I prefer the AP and will get a second one as funds permit. (AP in photo below is the same one as above).
• Same weapon-light as above.
• Sling is a coyote Wilderness single-pt with HK snap hook. I liked this sling a lot.
2) AR Magazines & Ammo.
I brought a bunch of 30-rd Labelles and several 20-rd Colt mags. Magpuls were attached to the bases for fast retrieval and
controlled insertion.
I shot the course with PMC 55gn FMJ (#PMC 223A). Although TDI's website specifies "1800-rds minimum," I brought 2000-rds,
but ended up shooting less, about 1700-rds. Most students shot less than that. I'd still bring about the same anyway, since
you can always shoot some of the drills more than once. With the LMT upper, I did experience one or two hesitations to feed
the first couple of rounds off a tight Labelle mag. However, a hard slap on the mag bottom or bolt assist caused the round
to chamber as normal. The Labelles were new-in-the-wrapper when acquired and are still breaking in. My guns exhibited no failures
to fire, extract or eject.
For a 55gn FMJ bullet shooting thru 1/7 twist barrels, the PMC was surprisingly accurate. It's somewhat dirty, but my guns
were kept well lubed with Breakfree. Each morning I applied fresh lube to the bolt carrier group and, just a couple of drops,
to the inside of the receiver. Other than wiping down the bolt carrier before lubrication, the guns weren't cleaned until
I got home.
3) A 10mm at TDI.
Transition drills were part of the course, so I brought my 10mm Glock 20 and several 15rd mags. You really didn't need more
than 100-rds of ammo. Double Tap Ammo's excellent 180gn FMJ training round (@ 1250fps/624fpe) proved to be very accurate
and controllable. It's the perfect choice for serious training with a 10mm autoloader. Frankly, if you were headed into a
military conflict and could take a 10mm along, but were limited to FMJ ammo, this round would make a great "combat" load.
Holsters used were a DeSantis C-2 and an Uncle Mike's Kydex rig. Both holsters worked well with a Wilderness 5-stitch Instructor
belt.
Not everyone brought a sidearm. Those who didn't hung out at the water table, swatted bugs, or loaded up their AR mags. Of
those students who brought pistols, most had either Glocks (40S&W mostly) or .45 1911s (Colts or Springfields, one was an
MC Operator, I believe). One guy used a 59XX-series S&W 9mm, which I assumed was his duty weapon. Holsters varied from nylon
cheapies to a SafariLand 6004 thigh rig.
4) Gun Comments & General Observations.
Almost two dozen students attended TR-I. The class was a good mix of civilians, law enforcement and military personnel, and
everyone work well together. With that many rifles on the line, and all of us busy shooting the drills, it was hard to study
each gun. But not everyone had a tricked-out 16" carbine. About half the students, plus a couple of the military people, shot
the course with a "no-frills" iron-sighted 20" barrel AR-15/A2 rifle. Most of these were standard Rock Rivers and Bushmasters,
along with a few Colts.
Of those with carbines, most used an optic, like an Aimpoint or ACOG, supplemented by BUIS. (ACOGs outnumbered the APs). A
couple of shooters had EOTechs. One student, a special forces operator, used a borrowed .223 Armalite topped with an AP only,
no BUIS sights. It ran fine and he shot the course very well.
A few guns exhibited all the latest "high speed" operator gear, from fluted barrels and exotic rail systems to the more expensive
Surefire Millenium lights and lasers. One rifle sported Leupold's CQ/T low-power scope. There is a point at which you can
have too much stuff hanging from your rifle, despite the "cool" factor. If you really need it, that's fine, but unnecessary
items only add weight you'll have to lug around.
Happily, most students came with their weapons pre-zeroed. There was a Robinson Arms rifle that had extraction problems from
the git-go and wasn't running reliably until the third day. Two instructors spent almost the entire first day with another
student just trying to get his AR "on paper" at 100yds. The good news is that all the instructors were very helpful and professional.
Nobody was made to feel like an idiot because his rifle wasn't running perfectly. Still, your money's better spent if you
arrive the first day with an AR that functions reliably, has been sighted-in, and has mags that work. Otherwise, more range
time is spent fiddling with the guns than actually shooting and learning something meaningful.
DAY 1: Precision Shooting
Students assembled in the large classroom building at 9:00 a.m. and completed the obligatory paperwork. John Benner introduced
himself and ten assistant instructors. A course orientation lecture followed. Basic information was provided about the AR-15/M-16
rifle, including the carbine version. On a nearby table lay the instructors' carbines - about a dozen in various configurations.
For those students less familiar with the AR-pattern rifle, these guns were helpful in demonstrating what set-ups are possible
with this system. Topics covered included collapsible vs. fixed stocks, barrel twist rates for specific bullet-weights, ammo
choices, optics and BUIS, and other gear options, like rails, rail covers, vertical foregrips and slings.
Before relocating to the range, a clear set of safety rules was reviewed in detail. The need for safe muzzle direction was
emphasized, as was keeping your finger out of the trigger guard and parallel with the barrel when not actually shooting. Also,
before the line would be deemed "safe" to go patch targets, all rifles had to be on the ground in the following condition:
mag removed; safety on; bolt locked back; ejection port/chamber facing up, so an instructor could visually verify that it
was unloaded. This regime was effective. During my 3 days there, I saw no unsafe weapon-handling.
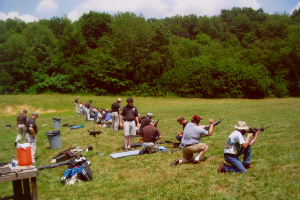
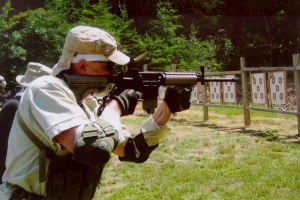
Students then went to the main rifle range, forming a line at the 100yd marker consisting of about 24 firing points. Initial
sighting-in took place from this distance. The main purpose here was to make sure everyone was "on paper." Being zeroed at
50yds, my rounds hit a bit high, but holding just under the bullseye put them back in the black.
Day 1 was devoted to the skills of precision shooting. Instructors stressed the marksmanship fundamentals of correct cheek-stock
weld, sight picture, breath control, and proper trigger manipulation. This was a familiar review since I have a background
in service rifle shooting. Students shot 5 or 10 rounds between checking their targets, which consisted of a 6" bull on a
larger white background. Students with optics and BUIS were encouraged to verify zero with both. That's what I did, and my
red dot kept me in the black. The Troy and Wilson BUIS were dead-on too.
Different shooting positions were reviewed, and the instructors demonstrated the ones we would be using for the course. These
included: prone (supported and unsupported); the squat, or "rice paddy prone"; kneeling; standing. In prone, firing
was also done from both strong and weak sides. In standing, the instructors stressed the "combat" or CQB stance as oppose
to the more bladed, off-hand style that competition shooters use. We would do much more shooting from the CQB stance on Day
2. It takes practice, but by the third day students were regularly banging steel poppers and plates in this position from
100yds.
After lunch, we again verified zero at 100yds, and did more shooting from supported/unsupported prone, kneeling, squatting,
and CQB offhand. Eventually, the line moved back to 200yds, firing from the supported prone position for some time. Later
on, we moved back to the 300yd line. In supported prone we fired the final series of strings for the day. I overheard a few
students express surprise that they could hit the target consistently from 300yds. But they did.
DAY 2: CQB drills & low-light/night shooting.
This was a long day.
We arrived on the range promptly at 9:00 a.m., where we sighted-in from 100yds. Then two of the instructors, Lynn Freshly
and David Bowie, demonstrated the basics of CQB shooting with a tactical rifle. This is defined as shooting from 50yds and
in. Points covered included: stance and grip, correctly shouldering the rifle, cheek weld and sight picture. The instructors
emphasized firing from a balanced "fighting stance." In the CQB stance, your weight is somewhat forward, with knees bent and
shoulders squared toward the target. The elbows are kept down and close to the body, with a good cheek-stock weld, the nose
at or near the charging handle. The rifle is "snapped up," target acquired, and trigger pressed. Use of the sling and the
forearm grip (for those who had them) were worked into the review.
The initial drills involved shooting from a stationary position at 25yds in order to get everyone used to firing in this upright
CQB stance. Small 5" targets were used to keep us focused on the need for controlled, accurate shooting. "Spray & pray"
was clearly discouraged. In these drills, students started from the muzzle down "low ready" position, snapped the rifle up
to cheek weld, acquired the target and fired a single shot. Then back to "ready" again. This was repeated for 20-rounds. Then
we switched to the weak side (left side, for me), shooting for another 20-rds. Then back to strong side, then weak side. Similar
drills followed in strings of about 10- or 20-rds, except single shots were replaced with double taps, both strong and weak
side. Then 3-rd "hammers." Again, the need for controlled fire was emphasized.
Next we worked on the transition drill. Getting your pistol into action when your rifle suddenly stops during a fight, whether
due to a malfunction or an empty mag, is an involuntary transition. The idea is to stay in the fight and prevail. But
TDI also teaches that tactical necessity might dictate a voluntary transition. This might occur if you're navigating
a narrow hall during a building search or when entering a confined area with tight corners. This drill had you load one round
in a mag, chamber it, then safe the rifle. From a low ready position, as before, you snapped the rifle up and fired until
you heard that discomforting "click" sound. For me, using a Wilderness single point sling, my carbine dropped smoothly out
of the way as I drew the G20 and double-tapped the target. Transition drills continued this way for about 50-rds.
Following lunch, we broke into smaller groups of 5 or 6 students for the various shoot-n-move CQB drills. These drills consisted
of moving in various directions while firing singles or double-taps at the targets. In one drill, students fired while moving
in a "box" or square-type direction - forward, then laterally, then backward. Another drill involved an "X"-type movement,
that is, diagonally first, then laterally. Another involved the use of a single file of cones to teach muzzle discipline while
moving and shooting. This one had students advancing toward the targets while weaving through the cones, dropping the muzzle
down as you passed across the cone in front so as not to sweep it.
Later, students were divided into groups and taken to the Live Fire Houses (LFH) for instruction on building/room search techniques.
LFHs are sometimes called "shoot houses" or "simulators." David Bowie instructed our group. He is a very meticulous searcher
who emphasized the need for cautious, precise footwork in "slicing the pie" into a room. Sharp corners can cause positional
problems, creating the risk of a gun-grab. Worse, there's a temptation to hurry. But "pieing" a room is done very slowly,
almost in baby steps, and without crowding corners. Dave demonstrated footwork, body mechanics, and how to maintain distance.
These are critical skills. Though popular on cop shows, so-called "dynamic" entries will likely get you killed. The basic
building search and room-clearing techniques taught at TDI would apply equally to a homeowner searching for an intruder, to
a cop clearing a warehouse for an active shooter, or to a Marine in Fallujah going house-to-house for insurgents.
The class broke for dinner and returned to the main range at 7:30 p.m. Under fading sunlight, the instructors discussed the
various options in weapon-mounted and hand-held lights, and demonstrated firing techniques with each type. Surefire flashlights,
small and large, seemed to be the predominant choice. A couple of instructors had SF's newer LED Millennium lights. We fired
on targets from 50yds, and then 25yds, using both hand-held and weapon-mounted lights. When it was completely dark, you could
appreciate which lights were superior for target identification at reasonable distance. My SF 962 worked fine for TDI's night
shoot, but it weighs significantly more than the Millennium unit and exhibits less brightness than an LED-based light. Since
weapons-light technology is rapidly evolving toward "smaller and brighter," I may re-think this piece of gear.
DAY 3: Round Robin Shoot-Out
The last day began early on the main range. Students were divided into four groups, with each group assigned to one of four
stations. Each station contained a different "shoot-out" event or scenario. Once your group finished one, you rotated to the
next. With almost 24 shooters working through four stations, the Shoot-Out ran all day.
(1) A Maze of Rooms
My group began at LFH #1. The object was simple: clear all the rooms in the structure. Exercise muzzle and trigger discipline.
Identify and engage "bad guys" as necessary (the instructors assisted with a bit of voice role-playing here). Don't shoot
good guys, hostages or other innocents. For me at least, LFH #1 proved to be hot and sweaty work. Tight spaces forced a voluntary
transition to my Glock 20 at least twice, but I cleared a maze of rooms connected by short halls. I nailed all the bad guys
without overlooking any or shooting any nonhostile targets. Others in my group did well too, so with some confidence we moved
to the next station.
(2) Jungle Trail Firefight
TDI's jungle trail snakes into the woods where tall trees create a canopy of shade. Thick brush crowds each side of the trail
at first, but further on fallen timber and shallow gullies join the undergrowth. The dark shade was broken in places by beams
of sunlight. The targets had been effectively camouflaged, and the patchy lighting only aggravated your ability to distinguish
a tree stump from the head and shoulders of a concealed hostile. The object in this scenario was to proceed up the trail at
whatever pace you deemed prudent, but within a time limit of 20 minutes, engaging bad guys as you detected them. Hopefully,
you wouldn't miss any. If you did, you were considered KIA, and your next of kin would be notified.
Afterward, one of the military people in my group commented that his unit would never proceed up a known trail, with its obvious
potential for ambushes, booby traps and tripwires. The instructors agreed, but emphasized that the exercise was less about
tactics and more about developing the students' visual acuity in "seeing" camouflaged targets in uneven woodland terrain.
This wasn't as easy as it might sound. Where the shade didn't hinder target detection, fallen logs and brush did. Targets
were also placed on rising ground and in the gullies, giving only slight exposure. I missed two on my run, but an instructor
later told me that almost everyone had missed these same targets.
(3) "Bang! You're Dead."
Let's just say LFH #2 was tough. Darker than the first, this structure had narrow halls, dangerous doorways, tight corners
and armed gang bangers everywhere. Still, the object here was the same as with LFH #1.
I "pied" the first room just fine, taking out a tattooed miscreant brandishing a sawed-off. I entered and started toward a
door on the other side, which was suspiciously half-open. I was already focusing on "pieing" into the next room when I heard:
"Bang! You're dead." It was a teachable moment for the instructor and definitely a learning experience for me. Turning, I
saw that the door behind me had swung closed, revealing a "blind spot," an opening about the size of a closet. Standing inside,
of course, was a bad guy with a .45. Had this been for real, his shots at my back would have been pitifully easy since we
were within spitting distance. This opening became hidden behind the first door when I pushed it open, and my attention was
drawn elsewhere. I failed to clear all the areas behind me before moving on. Lessons learned: don't be in a hurry;
check everything methodically; and just because you eliminate one threat doesn't mean there aren't more lurking nearby. After
that, I took longer than I should have to clear the remaining rooms. Others in my group ran into problems inside LFH #2. It
sure gave me something to think about.
(4) Poppers and Plates
My group ended the Round Robin back on the main range. Steel silhouette poppers and hanging plates were set-up for CQB drills
against time. After working the three previous stations in 90-degree heat, this last event tested both your stamina and the
level of your precision shooting skills. But firing on the plates and poppers was also competitive fun. First from 100yds,
and then 50yds, each shooter fired about 10-rds per popper or plate from a standing or kneeling position. Instructors called
out hits or misses while you shot, assessing your CQB form and coaching those whose technique needed adjustment. We shot this
last station until it was time to go. Here, despite being hot and tired, your ability to make precise shots on small targets
was directly a function of the marksmanship fundamentals you developed over the previous two days.
As students completed their last stations, rifles were cleared and people returned to the classroom building. There, John
Benner awarded certificates and everyone shook hands.
Conclusions
John Benner runs an excellent program at TDI. The instruction at TR-I was first-rate and effective. My skills in handling
and shooting a tactical rifle definitely improved. The instructors were friendly and encouraging, especially with the less
experienced students. Happily, TR-I is not a 3-day boot camp. There was nobody who looked like Lee Ermey standing over me
screaming "maggot!" for missing a shot or two.
In terms of its physical layout, TDI provides a first-class training facility within which to hone defensive shooting skills
in different environments. Even those who have extensive experience with the AR-pattern rifle can still benefit from this
course in terms of maintaining a high-level skill set. TR-I provides an excellent review of CQB fundamentals and tactical
concepts for fighting with this weapon. The fact that experienced military and law enforcement personnel chose to take this
course speaks for itself.
More pictures and a postscript on gear issues follow below.
agtman
Tactical
Defense
Institute
|
 |
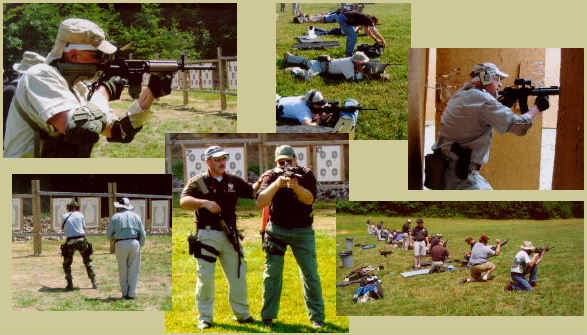
Tactical Rifle I
(click on images for larger view)
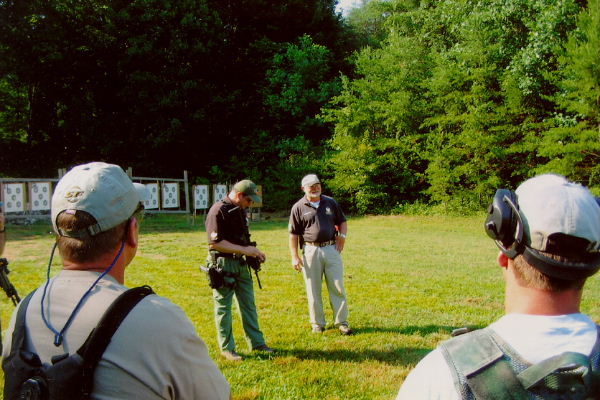
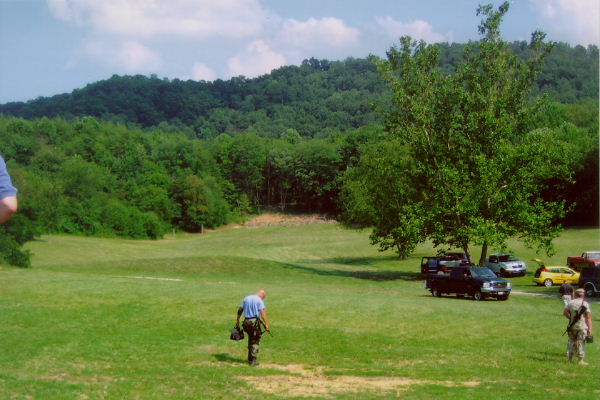
| TDI's Chief Instructor, John Benner, with cigar in
hand, greeted students promptly at 8:45 a.m. each day on the main range. A very personable gentleman, John strongly resembles
Ernest Hemingway.
|
 |
 |
Day 1: precision shooting skills.
Students
sight-in their rifles from the 100yd firing line.
|
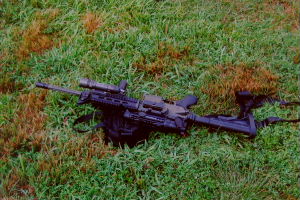
High Speed, Low Drag.
There were well-over 2 dozen
ARs in various configurations at TR-1, including the instructors' weapons. The tactical carbine above belonged to a student.
It sports a fluted barrel floated inside a foreend rail, Ergo grip, SOG vertical foregrip, single-point sling, SureFire 951
weapon-light w/ pressure switch, and Leupold Mk 4 CQ/T 1-3x scope. The CQ/T features an illuminated circle dot reticle and
an integral rail attachment base. Despite all that, you were still good to go for this course with just a no-frills, iron-sighted
AR and a few reliable mags.
|
 |
 |
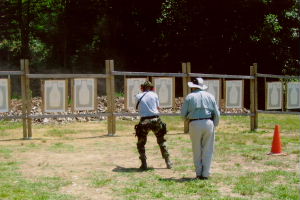
| Firing from 200yds in supported prone, students work
on their marksmanship fundamentals. Blonde operator in foreground is using an ACOG optic. She had previous training with
her AR and was a good shot. Note the Glock 23 on her hip.
|
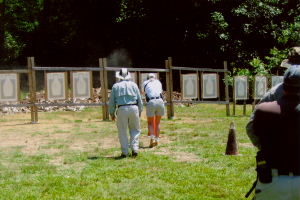
View from TDI's 300-yd line.
|
 |
 |
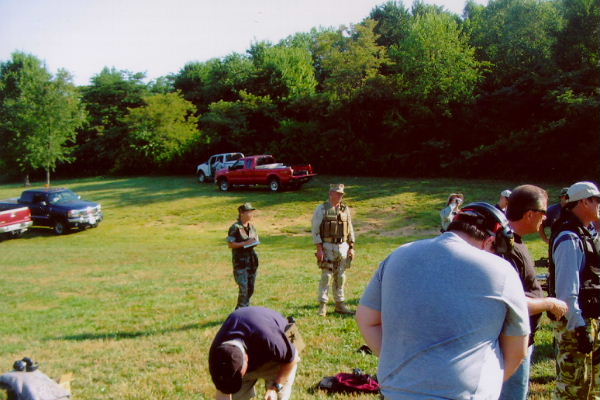
| TR-I students included males and females and were a
friendly mix of about two dozen people: civilians, law enforcement and military. All worked well together over the 3-day
course. It was interesting to see the different levels of skill and experience among the group.
|
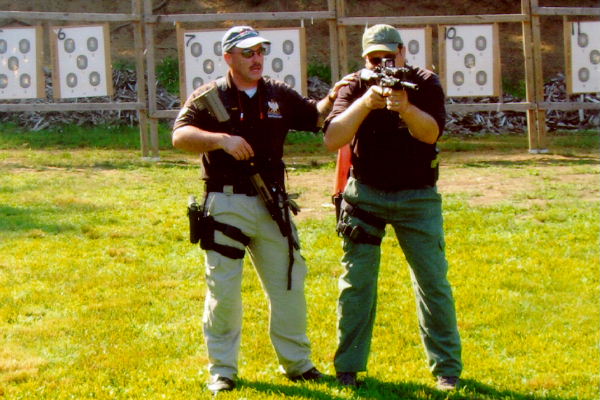
Day 2: CQB Drills.
TDI instructors David
Bowie (l) and Lynn Freshly (r) demonstrate proper CQB shooting form: shoulders squared forward toward target; knees slightly
bent; elbows down and in; good cheek-to-stock weld; nose at or near the charging handle. Use of the sling and vertical foregrip
were also reviewed.
|
 |
 |
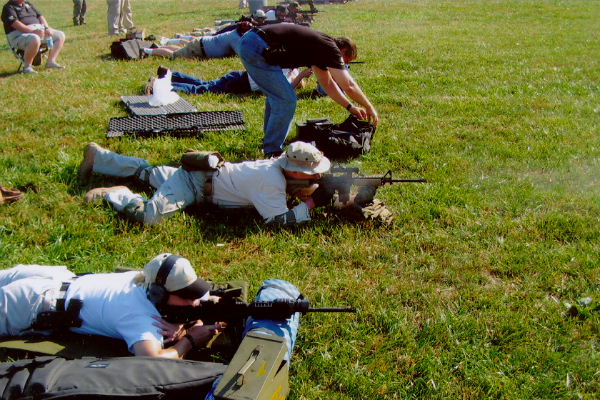
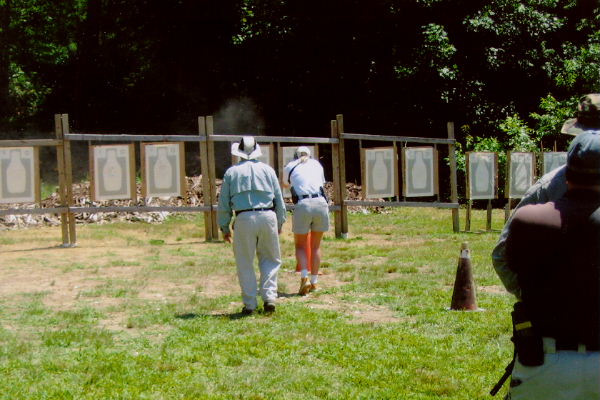
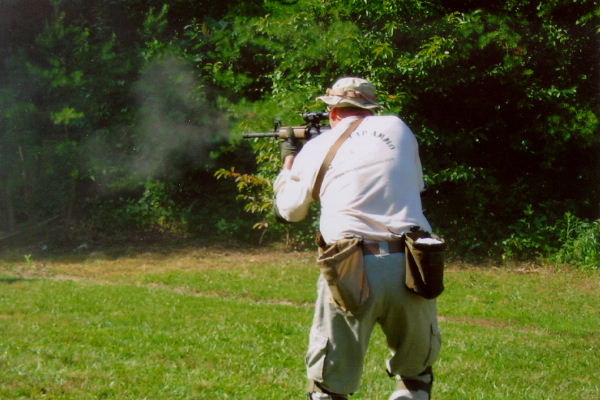
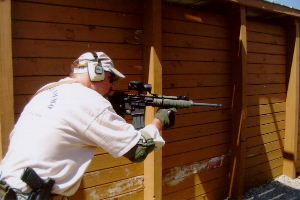
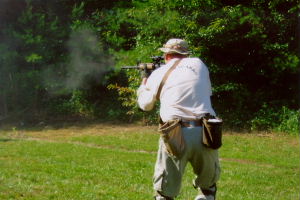
Brass flies during CQB drills.
Single shots, double-taps,
triple-taps, and "hammers." These were practiced from both strong and weak sides. Small 5-inch targets kept students focused
on the need for controlled, accurate shooting. "Spray & pray" was clearly discouraged.
|
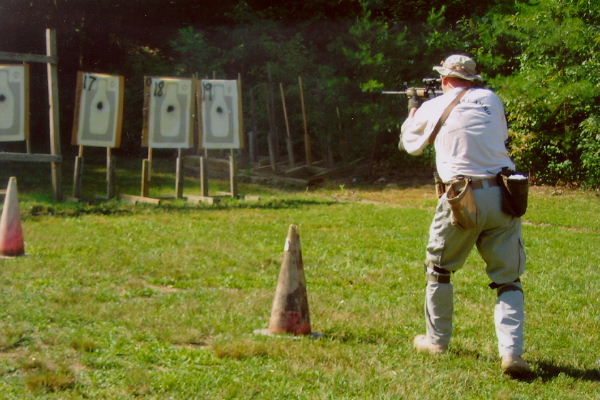
CQB shoot & move drills.
Here this student works
a drill in which he fires at targets while moving forward, then laterally (sideways), then backward in a 'square' or box-type
pattern. Careful footwork prevents tripping.
|
 |
 |
Tearing it up on the 'X' drill.
This gal had skills.
Here, she fires her carbine while moving diagonally forward toward the orange cone, then across the target line (still firing),
and then backwards diagonally. She shot tight groups.
|
Doing the "weave" drill.
This student fires while
weaving right & left through a single file of cones, dropping the muzzle on each pass so as not to sweep the cone ahead, then
reacquiring the targets once outside the cones. Object is to exercise muzzle discipline while moving and shooting accurately.
|
 |
 |
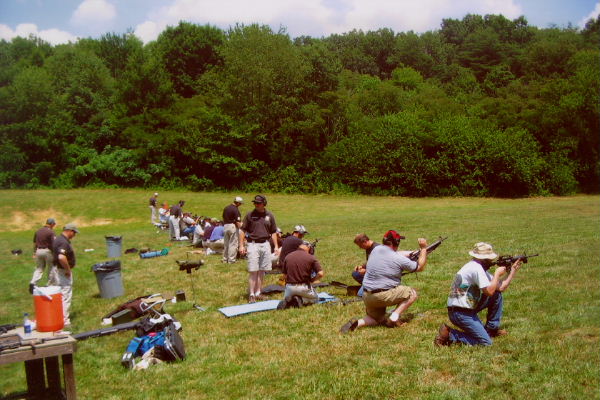
Day 3: Round Robin Shoot-Out.
Locked and
loaded for Live Fire House #1, this shooter approaches the first door. What's behind it? Grandma baking cookies or a crackhead
with an AK? Don't be in a hurry, watch your back, and only shoot the "bad guys."
|
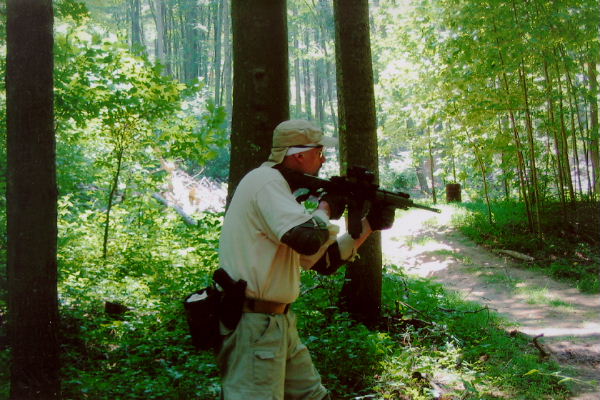
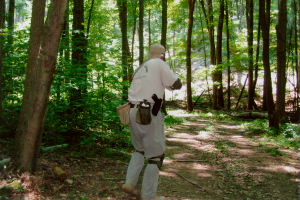
Jungle Trail scenario.
U.S. operator is dropped
"in country" with no back-up. Object is to find and engage bad guys while proceeding up trail to extraction point. Targets
were effectively camouflaged and positioned amid thick brush and uneven terrain. How many can you see here?
|
 |
 |
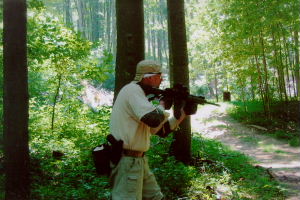
Rumble in the jungle.
Running low on ammo, this
operator searches for bad guys during firefight along trail. Fallen timber and patchy lighting made them difficult to detect.
If you overlooked any, you were deemed KIA. He missed two, so his next of kin were notified.
|
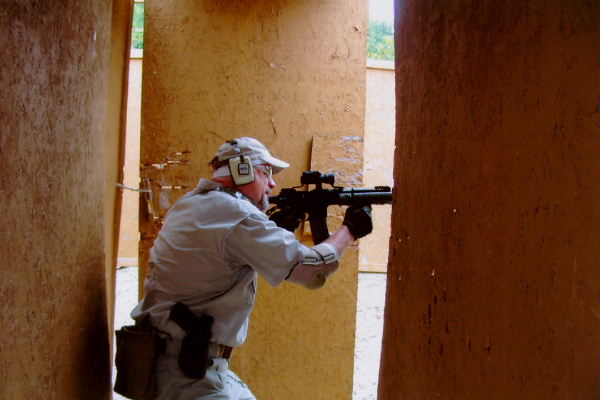
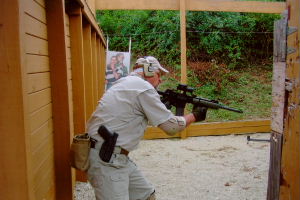
Inside Live Fire House #2, the fighting goes room to
room.
This shooter just took out one thug (holding hostage in background), but more are lurking nearby. He's positioning himself
to "pie" the next room. Don't crowd the corners, use careful footwork, and keep aware of what's around you.
|
 |
 |
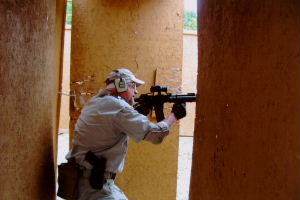
"Bang! You're dead."
Live Fire House #2 had dark
halls, dangerous doorways, and armed gangbangers everywhere. We learned critical survival lessons here.
|
Having a blast at TDI
The instruction in the TR-I
course was first-rate and effective, and my skills definitely improved. Even experienced tactical shooters with a high level
skill-set can still benefit from the review of fundamentals this 3-day course provides. TDI also offers a more advanced class,
Tactical Rifle II, which is a 2-day course. It features a variety of challenging CQB drills and more difficult tactical scenarios
set up on the outdoor ranges and in the LFHs.
|
TDI POSTSCRIPT: TRAINING GEAR & OTHER ISSUES
You don't have to be a training guru or high-speed operator to understand that certain types of gear, including clothing,
can not only augment your training, but actually make the whole learning experience more effective. You can stay focused on
what's being taught in the drills instead of getting distracted.
Any training school you attend will most likely have their own list of recommended and mandatory items to bring, in
addition to your rifle and ammo. Those who registered for TR-I received such a list. Beyond what the school requires, when
considering other gear to take, ask yourself this: is it likely to enhance, rather than hinder, the training experience? Is
it more than you really need for the course?
What follows below is a list of what I took/wore/used during the 3-day TR-I course. Some of the items mentioned might not
be what you'd take, but this stuff worked for me. It's offered here merely to give the person who is new to tactical rifle
training some ideas for their own list. Whether attending tactical training at TDI or elsewhere, it pays to think as carefully
about your gear choices as you would about your rifle, optic or ammo.
For those considering the tactical rifle course at TDI, remember that summertime in southern Ohio, while occasionally rainy,
is more often sunny, hot and humid - so dress accordingly. That means that light weight, light-colored clothing is preferable
since it tends to reflect sunlight and dissipate body heat. Some guys showed up on the first day wearing heavy cotton shirts
and denim jeans. After 6 or 7 hours in the heat (think high 80s, low 90s), they didn't look real comfortable.
1) Cabela's lightweight hiker pants. Very breathable, 7 pockets, and in the khaki/tan color you feel the heat less.
Some people wore shorts, but by Day 3 their legs had scrapes from the position shooting on the ground. Also, some got blisters
from being burned when a hot barrel brushed or bumped against their knee or thigh, which can happen when working with a sling.
2) Wilderness 5-Stitch Instructors belt. This is a great belt. Mine held the weight of a pistol and holster, as well
as two dump pouches (described below).
3) Lightweight, light colored collared shirts. Gander Mountain and Cabela's both sell those vented, hot-weather
collared fishing shirts. A light t-shirt works fine for a while, but the purpose of a collared shirt is to keep your sling,
or the straps of a chest rig, from rubbing you neck raw during training. Imagine having a sunburned neck with the edge of
a rough sling or strap sawing against it for several hours.
4) Converse desert boots & Smart Wool light hiker socks. These boots wore like comfortable running shoes. Some students
just wore tennis shoes, which is perfectly fine. TR-I doesn't require anyone to do sprints, but there is a lot of walking
around, so comfortable footwear is mandatory. It also helps to be in relatively good physical shape since you'll be moving
around in the heat of the day while carrying the weight of a slung rifle, loaded magazines, etc.
5) Shooting glasses (tinted or otherwise) & ear protection. These are sure to be on the list of items that any training
school requires you to bring. They are common-sense safety gear and should always be considered mandatory.
6) Ball caps & boonie hats. Keeping the sun out of your eyes while increasing the protection for your face against
flying brass is always a good thing.
7) Hatch "operator" gloves. Gloves are a personal thing. A few people shot the TR-I course wearing gloves, most shot
without. I've shot rifles with and without, so I'm used to them. It's easy to get burned by an AR's barrel after firing it
on a hot sunny day. Rail covers help a bit for handling, but the gloves were additional insurance and didn't cause me any
trigger "control" problems.
8) Hatch elbow & knee pads. Most students didn't use pads, while a few TDI veterans brought shooting mats. Mats are
okay for position work during the precision shooting on Day 1 if you don't mind lugging them all over the course as the firing
points change (100yds back to 300yds). For me, the Hatch pads worked great, being there when I needed to kneel or go prone,
or when I banged against something inside a LFH.
9) Eagle Chest Rig. This basic rig uses shoulder straps and has 4 pouches strung across the chest. Each pouch holds
a 30-rd AR mag, but works fine with 20-rounders too. On either end of the AR pouches is a pistol mag pouch. These will hold
Glock 20/21-size mags. They can also hold a small flashlight. The Eagle is not as weighty as some rigs that hold 8-10 mags
and are intended for military use. On the other hand, the shoulder straps are thin and unpadded, and can shift during activity.
For TR-I, it worked fine, but more padding would have increased both comfort and stability.
10) Specter Belt Pouches. Specter makes belt-mountable mag pouches for both 20- and 30-rd AR mags. Most students didn't
use chest rigs - and, frankly, in most drills you weren't shooting enough rounds in succession to need one. Just a couple
of 30-rd mags were sufficient. For those times, the Specter belt units worked great.
11) Maxpedition "Rolly-Polly" Dump Pouches. These pouches attach securely on the belt and are wide enough to hold
seven 30-rd mags, without being too ungainly or wobbly. They were very useful pieces of gear, and I wore two. For me
they rode best in the 5 & 8 o'clock (kidney) positions. When not in use, the pouch can be rolled up into an unobtrusive "egg
roll" shape. It can hold other things too. While initially shooting the CQB drills with just iron sights, I stored my Aimpoint
inside one. Another time, one pouch conveniently held a bottle of cold water.
12) Maxpedition Fatboy Versipak. This unit carried extra loaded mags, ammo, LULA mag loader, tools, keys, etc. Very
handy and not a lot of extra weight to lug around.
13) Miscellaneous stuff. Bring sunscreen, bug spray, and rain gear (however, it didn't rain during the July course
I took and the bugs weren't bad). Even if not needed, it's better to have these items with you since summer weather can be
unpredictable. Also, bring water or Gatorade and stay hydrated. Temperatures were in the high 80s and, on the third day, low
90s. TDI provides water and encourages water breaks, but I brought Gatorade anyway, as I pretty much grew up on it playing
football. Some students used camelback units to stay hydrated during the drills.
SLINGS, TRIGGERS & MAGAZINES
I didn't include detailed comments on these topics in the TR-I review, since they were more or less tangential. Strictly speaking,
choices about AR slings (or sling types), magazines, and triggers relate directly to your weapon - unlike the boots, mag carriers,
dump pouches and other non-gun gear discussed above. The following comments are based on my observations during the TR-I course
and elsewhere. I fully recognize they're just my opinions. Others may have a different view.
1) Slings
As noted early in the review, I used a single-point sling on both my carbines. It worked great for both carry and manipulation
of the gun during CQB drills. Several other students also used a single-point sling, while some used a 2-point set-up. I dont
recall seeing any 3-point slings in use, even by the military folks.
A number of students, however, showed up with no sling. Of these, a few shot the 3-day course without any sling, but
others went ahead and purchased one from a TDI instructor during the orientation session on Day 1. These were 2-point Blackchicken
slings.
A good sling, in my opinion, is necessary for retention and control of your weapon while training or fighting. Whether it's
a single-point or not is more of a personal preference. But using a sling in CQB-type shooting is a new experience for many
people. Before doing live-fire drills, you should try some dry runs with the sling actually on your (unloaded) rifle. The
purpose for this is to determine what specific sling set-up works best (e.g., how much slack is just right). You'll get some
idea of how hard or easy it will be to manipulate the weapon with the sling on while shooting or when transitioning to your
pistol.
Why is this important? Well, during lunch on Day 2, there was discussion about a certain student who was new to tactical shooting.
He shot the transition drills that morning using some type of 2-point sling. When he dropped his AR to draw his 1911, the
rifle's pistol grip swung down and hit him in the groin. Since nobody was reported wounded by a .45 slug fired wildly in agony,
he must have retained some measure of control. Obviously, though, it's less painful for you and less harrowing for others
if you take the time beforehand to work out "fit" issues with your sling and to practice with it.
2) Triggers
There's been a fair amount of heated debate in the on-line AR community about the desirability or usefulness of a "match grade"
trigger in a rifle or carbine intended for hard training and real-world fighting. Some of this debate has spilled over into
the gun magazines (e.g., SWAT). The view against using match triggers in fighting rifles is that they're too fragile and will
break down under sustained firing and hard battlefield use. Match triggers, according to their opponents, are best left to
those with yellow glasses doing competitive shooting on square ranges.
Here's my experience. As a test, my carbines ran both the standard and match types at TDI. The LMT carbine had the standard
or stock military trigger group, but the pull-weight wasn't too bad. In the Colt, I installed the Rock River Arms (RRA) 2-stage
match trigger unit. Before attending TDI, I'd shot well over 700-rds through this gun with this trigger, and there were no
problems whatsoever. During the 3-day TR-I course, it fired off at least 800-plus rounds. This firing included double-taps,
triple-taps and multiple round "hammers." In fact, I shot it extra hard just to wring it out (5- and 10-rd rapid-fire strings).
For the distance shooting on Day 1, the RRA unit produced some great groups. But it worked just as well in CQB shooting as
the stock trigger. While some match triggers may be junk, the RRA held up.
For what it's worth, before going to TDI, I got to talk with two shooters who'd taken the 3-day Pat Rogers Tactical Carbine
class up in Michigan earlier in the summer. We specifically discussed this debate and the RRA match trigger. Both had run
their carbines with the RRA unit installed, and each fired well over 1200-rds in similar hard use drills with no problems.
Besides all the CQB drills, the Rogers course ended with his students shooting the MEU-SOC qualification course against time,
and both shooters reported scoring well.
Again, the stock trigger is fine for basic tactical rifle training (i.e., a course like TR-I), and probably the AR neophyte
should stick with that. But if you ever decide to upgrade, the RRA 2-stage unit is one to consider. I really like mine.
3) Magazines
As noted in the review, my AR mags consisted of 30-rd Labelles and 20-rd Colt factory mags. Except for one unusually stiff
Labelle, I had no magazine problems. While I didn't see that many malfunctions in other students' rifles, some hiccups were
clearly mag-related.
For both real-world use and hard tactical training, it pays to procure a large supply of quality, mil-spec AR mags. Since
many, if not most, AR malfunctions can be traced to the magazine, don't skimp by going with crappy aftermarket mags. Once
you have a supply of quality mags, check them for fit and function in your rifle. Shoot enough ammo through each mag
without malfunction to know that they will run reliably during training or the real deal.
But I also have a cautionary tale to pass on. A famous gun writer attended the TR-I course, having been contracted by a gun
magazine to do a piece on it. I'm not going to disclose his name on-line, but if you read the gun rags at all you'd recognize
it. He shot near me on the line and was an amiable guy. He used a slick looking carbine with a nice rail set-up and an Aimpoint.
His gun ran fine for most of the course using 30-rd mil-spec mags.
But then the writer pulled out some new HK mags. These all-steel mags retail from $45-$60 and supposedly are the best on the
market today. Unfortunately, his carbine thought otherwise and started choking when he fed it these mags. Now maybe they were
out-of-spec samples or maybe his gun had other issues. Who knows? But the HKs quickly turned his perfectly functioning AR
into a jam-o-matic. Not disrespecting this gentleman, but there's a lesson here: price and name alone are no guarantee of
reliability in your gun. Before taking a tactical rifle course, shoot your rifle enough with all the mags you'll be
using to know they'll work every time.
agtman
|